If you have an unknown transistor, the first step is to identify its collector, base, and emitter terminals, as well as determine whether it is an NPN or PNP type.
Tools Needed
You’ll need a basic multimeter, specifically an analog meter—a type that features a scale and a needle for readings. This meter can measure resistance, voltage, and current, but for this test, we’ll focus on the resistance settings.
When the needle indicates “1” on the “x1k” setting, it represents 1,000 ohms (1k). Similarly, if it reads “1” on the “x10k” setting, that means 10,000 ohms (10k). Use these readings to calculate other values on the scale. Note that resistance values can become closely spaced and less accurate at the high end of the scale, but this will not affect your transistor testing.
Step 1: Identifying the Base and Type
Set your multimeter to the “x10” setting.
Take your unknown transistor and test it across all six combinations of its three pins.
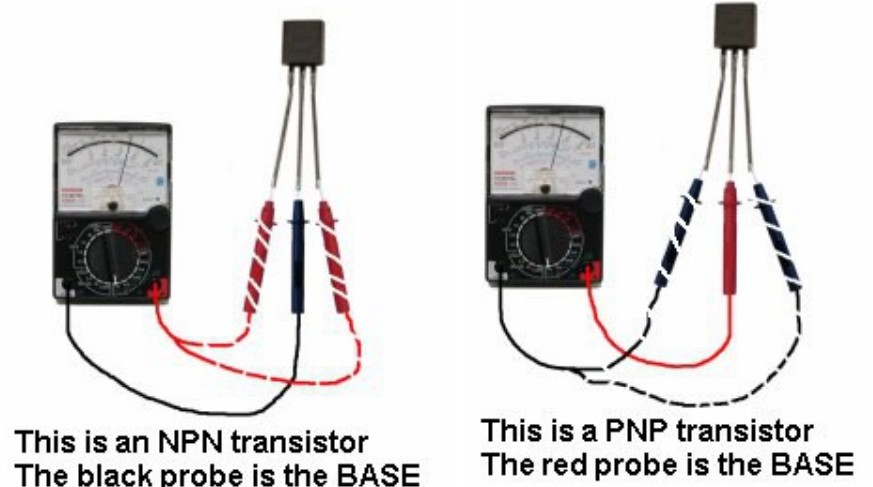
If the black probe is on the base and the red probe causes the meter to swing nearly full scale, you have an NPN transistor.
Conversely, if the red probe is on the base and the black probe causes the swing, it is a PNP transistor.
If the needle swings fully or produces more than two readings, the transistor may be faulty.
Understanding the Meter Scale
The resistance scale on the meter will be the top scale, starting at zero on the right and increasing to the left, which is the opposite of other scales. When you touch the two probes together, the needle should swing to the full scale and read “zero.” Adjust the potentiometer on the side of the meter to ensure the pointer reads exactly zero.
Reading the Values
On the “x10” setting, a needle position at “1” indicates a resistance of 10 ohms.
On the “x100” setting, a reading of “1” corresponds to 100 ohms.
With these steps, you can successfully test an unknown transistor and determine its type and functionality.
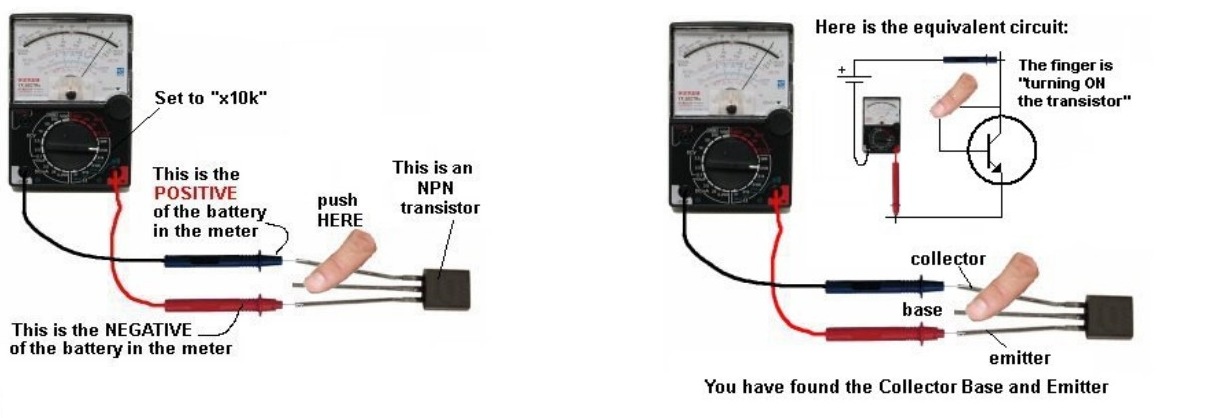
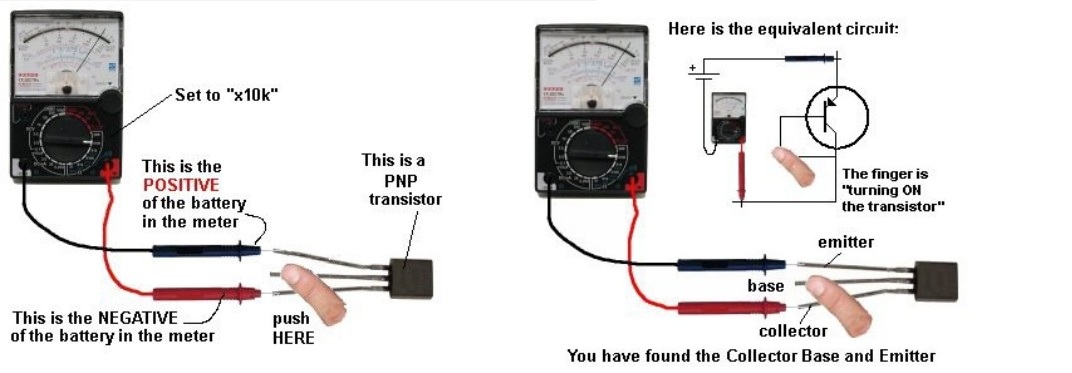
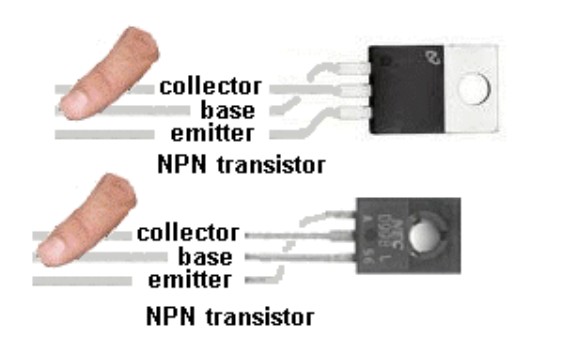
For an NPN transistor, connect the leads as indicated in the diagram below. When you press firmly on the two specified leads, the needle should swing nearly to the full scale.
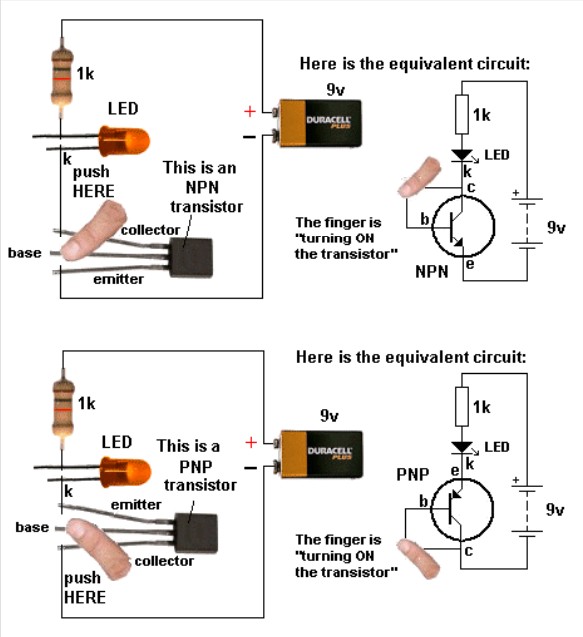
Simplest Transistor Tester
The most basic transistor tester consists of a 9V battery, a 1k resistor, and an LED of any color. Experiment by connecting the transistor in various combinations until you achieve one of the circuits shown below. When you press on the two leads, the LED will brighten. The transistor will either be NPN or PNP, and the leads will be identified accordingly:
The leads of some transistors may need to be bent to match the pin positions shown in the diagrams. This adjustment helps illustrate how the transistor is activated. This method is applicable to NPN, PNP, and Darlington transistors.
